Monday, December 9, 2019

My 3 takeaways

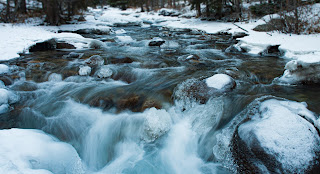
The first important thing I learned in this class is the exposure triangle and how to apply it when shooting. Setting my camera in manual mode and adjusting the aperture, shutter speed, and ISO to properly expose my picture or make cool effects like the one below are vital in my progression as a photographer. Before I would just set my camera to auto and many times, I would end up with photos either under or overexposed, grainy, or not have what I want in focus. 


The second important thing I learned was how to effectively use lightroom to greatly improve my photos. This involved getting rid of distractions, frame the photo better, bring out detail, and bring out the colors that get lost sometimes in the raw image. Knowing the rules of dominance really helped with this. I did a blog post that shows comparisons and goes more into this, linked below. 


My final takeaway was not something directly taught to us in class, but something I discovered while trying to get 25 photos I like for my final in this class and looking at my classmates' photos. This is the fact that you can get great photos with a limited ability to travel, both because of money and available free time. I used to think to get great shots you need to travel to some amazingly beautiful place, but I realized that is simply not true. If you put some thought into what you shoot, frame it properly, edit, and use some creativity you can make some good pictures. in your local area. My photo, which is below, I believe is an example of this. For this, I just drove a little south of billings, stopped my car and took this photo.

Final

Every photo is taken on a Nikon D5000 with a Nikon AF-S DX Nikkor 18-70mm F/3.5-4.5G IF-ED lens.


 1.6 sec, f/10, ISO 2OO,18mm
 1/200, f/22, ISO 200, 18mm
  1/200, f/22, ISO 200, 18mm
 1/250, f/4.5, ISO 200, 70mm
  1/250, f/4.5, ISO 200, 70mm
   1/250, f/4.5, ISO 200, 70mm
 1/640, f/8, IS0200, 18mm
 1/250, f/11, ISO 200, 18mm
 1/40, f/111, ISO 200, 18mm
 1/250, f/11, ISO 200, 40mm
 1/50, f/22, ISO 200, 18mm
 1/25, f/22, ISO 200, 18mm
 1/80, f/22, ISO 200, 70mm
  1/80, f/22, ISO 200, 70mm
 1/50, f/22, ISO 200, 48mm
 1/3, f/22, ISO 200, 18mm
 1/30, f/22, ISO 200, 18mm
1/80, f/8, ISO 200, 18mm
 1/80, f/18, ISO 200
 1/60, f/18, ISO 200, 70mm
 1/640, f/3.5, 18mm
 1/60, f/18, ISO 200, 48mm
 1/80, f/22, ISO 200, 56mm
 1/60, f/29, ISO 200, 40mm
1/60, f/22, ISO 200

Wednesday, December 4, 2019

Michael Kenna

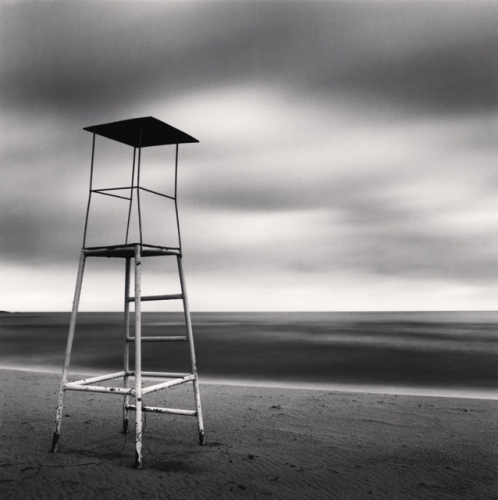
One of the popular landscape photographers I like is Michael Kenna. One of the reasons his work is some of my favorites is his unique style. He shoots in almost all black and white and all of the seen are very simple and minimalistic. Below are two great examples of this.


His work is inspiring and beautiful to me because he manages to make such powerful images while keeping it so simple, colorless and minimal. He proves that you do not need big glamourous and beautiful landscapes in perfect conditions at the right time to shoot great photos. It proves you can make great photography in your local area of almost anything. Another thing I like is how he has galleries from places he travels, which I have linked below, and manages to use such simple photography a small number of images to tell a lot about the places he goes. I think a lot of his photos really fit the saying "a picture is worth a thousand words".


Monday, November 18, 2019

Black and White Photography (my attempt)

Earlier in the semester, I did a blog post about doing black and white photography. I linked an article I read about how it can bring a new perspective to something, eliminate distractions, bring out detail, and create a more powerful image. I mentioned how I wanted to create some black and white shots. So, that's exactly what I did. Below are two examples of it.


This photo I took at Timberline lake early in the semester is an example of a photo where I believe that black and white made it more powerful and striking than it was in color. It lets the viewer focus more on the detail of the rock and clouds.


In this photo, the main reason I made it black and white was that there was a very distracting red/orange reflection on the water. Bringing it to black and white eliminated that distraction bringing the point of focus back to the duck. This also fits well with the minimalist photography which I discussed in another blog post.

Monday, November 11, 2019

The Power of Adobe Lightroom

When you go out for a photoshoot, especially when you are an amateur like myself, it can be difficult to get your picture to look as you intended. This can be because of a number of factors such as aspect ratio, white balance, exposure, color, composition, etc. Luckily, for us in this modern age, where we have digital cameras with flash memory, these problems that make for a less than desirable photo can be fixed relatively easily and conveniently. This is because of a program called Adobe Lightroom Classic. Below I will compare the final edited images from the previous share two and critique compared to their original, completely unedited form.


 As you can see in the second image, I was able to use the lightroom crop tool to remove distracting elements from the frame. I was also able to bring out more detail in the bridge and some of the background trees. Third, I made some adjustments to the basic settings to really bring out the red in the bridge as well as the warm evening colors/lighting.


In this photo, I used the crop tool a lot to get rid of much of the distracting background and foreground and really make the subject the obvious center of focus. I used the saturation and vibrancy tools to bring out the colors. Finally, I used the brush tool to help brighten up the duck and further display it's colors. The editing really improved the quality of this picture by bringing focus to the subject, and bring color to the originally bland picture.

If you end up with photos you don like after a shoot, hope of ending up with something good is not lost. If you know how to properly use it and have a bit of patience, you can use lightroom to make it into something you can be proud of. I believe the photos above prove that point.


Wednesday, November 6, 2019

Tuesday, November 5, 2019

High Speed Photography

 The high-speed photography style is an interesting artistic choice to me. It can produce very striking images that capture the viewers' attention because it is something that cannot be seen by the human eye. While a lot of the time it is not applied to landscape and nature photography, it definitely can, with things such as capturing a hummingbird's wings in detail while they are in motion, or capturing images of waves crashing on rocks with all the individual water droplets in detail. Below I have linked an article that explains how to do this photography. You would think you could only capture high-speed images with a special camera capable of extremely fast shutter speeds. This article explains how to capture these high-speed images with most digital cameras that have manual settings.

Like I said before, he talks about how really any digital camera with manual settings would work just fine for high-speed photography as well as any lens is fine as well. The only other equipment requirements are a tripod and a flash. He discusses doing this type of photography in a dark room. What he does is set the camera to bulb mode and uses the flash to expose the shot at the right moment and also uses a narrow aperture. He says to use the flash at the lowest power setting so it is as short as possible. This can produce amazing shots that will be very striking because it is not something you can normally see.


Wednesday, October 30, 2019

Underwater Photography


Another interesting and rather challenging type of photography is underwater photography. This can include a variety of many different subjects, but I think the most striking and interesting underwater pictures are those where the subject is coral reefs. This is because it will capture the immense biodiversity and beautiful array of colors. The article I have linked below explains how he does "reefscape"  photography.

He first recommends the use of a wide-angle fisheye lens. He recommends this because in an underwater scene it is rare that you find straight lines, therefore you do not have to worry as much about strange distortion around the outer areas of the image as you would with landscape photography. He also says rectilinear lenses can have issues with sharpness around the edges and that you will not get as wid of a horizontal field of view. He says to just use natural light and have it behind you since most reefs are shallow. Manually set your white balance using some white slate such as the sand and to shoot in the morning or afternoon for the best lighting. For settings, he recommends a somewhat fast shutter speed, an aperture higher than f/8 for a wide depth of field and adjust iso accordingly considering how much light is coming through at that depth. He talks about how you can use thee ripples/waves creating interesting lighting effects or go on a very calm day to capture a reflection off the surface of the water or to capture what's above the water such as the clouds. He says that the colors can contrast very well with the blue of the surrounding ocean, so that could be your backdrop. Reefs can have colors that are distracting according to the rules of dominance such as reds and oranges, it is definitely something you will have to keep in mind. Another tip was to keep things such as boats, snorkelers, and other divers out of the frame because since they are out of place in that scene, they will be distracting. Photographing coral reefs can make for some beautiful pictures, but can also be challenging for the reasons I previously mentioned, not to mention being able to scuba dive to even attempt these shots. 


https://www.sportdiver.com/photography-tips-coral-reefs

Wednesday, October 23, 2019

Tuesday, October 22, 2019

Black and White Photography.

In modern times, with the wide availability of color digital cameras, much of the landscape and wildlife photography is mostly done in color. Despite this, I think that black and white photography is somewhat underrated and underused. Although many professional photographers use black and white sometimes, I believe that it should be more used and appreciated.

 An article, which I linked below, discusses the benefits and reasoning as to why black and white photography is more powerful and can bring a new perspective to the subject. First, it states that colors can be distracting, making it hard to focus on the subject and sometimes detracting from the intended message and focus. The textbook states that reds can be very distracting when they are not a part of the intended subject. so using a black and white filter when editing can be a creative way to solve this issue if it exists in one of your photos. The intended subject becomes much easier to focus on for the audience. Next, he states that it keeps you focused on the composition and texture of the photo. It's easier to focus on. It draws focus to the shapes, light and shadows, and lines and perspective. This can make the photo more convincing and powerful than it would be if it was in color. Finally, he states that it can be more classy, aesthetic and bring an artistic look that does not come in color.

I think that black and white photography also brings out details that may otherwise be overlooked in a color photo. I also think it takes a good eye for composition to make these photos work.

http://blog.pho.to/the-power-of-black-and-white-photography/


Tuesday, October 15, 2019

Minimalist Photography

One more "artistic" form of photography that intrigued me is minimalist photography. This is not to say that other forms of photography are not artistic but minimalism photography often has an artistic message, meaning or a point to get across. The subject and composition can be anything but I prefer Below are some examples of this style of photography that I particularly like.


An article that had these photos posted discusses what minimalist photography is and the point behind it. She talks about how a picture can have portrayed a lot of information but in minimalist photography, you can say something meaningful and powerful with less. She says this photography strips away unnecessary subject matter, to say and show what you want with as little as possible. She says that the trick is to say just enough and let the audience fill in the rest. You could conclude that it is a method of saying more with less using photography. 

Obviously, the most challenging part of this is the composure, the other knowledge and skills are secondary to this. It clearly requires a high level of creativity to decide what exactly to include in the frame to get your point across. You also have to know what that point you are trying to make with your photo is before this. Minimalist nature photography is something that I want to pursue, but I know it will require a lot of work and practice.


Thursday, October 3, 2019

Lightning Photography

One beautiful form of photography that I personally love is lightning photography. It is something that I want to capture at some point, but I had no idea how photographers capture these amazing lightning shots. I found an article (linked below) that explains how it is done.

The writer of this article covers all his recommendations for capturing photographs of lightning. I will go over some of his recommendations, the ones that are not obvious and the more important ones. First, he says to set it to manual focus and set it to infinity because the lightning will cause issues with the autofocus sensor and it will make sure all the lightning is in focus. Next, he talks about timing and recommends using bulb mode and holding the shutter open until the lightning strikes and closing it immediately after the strike ends and also recommends using the mirror lock-up feature. He then discusses composure where he recommends having something in the shot for scale/perspective. Other than bulb mode he says to set the iso to 200 for a less noisy image and since it's in low-light conditions to use a shallow depth-of-field like f/2.8-f5.6. In terms of equipment, he recommends a wide-angle lens, a sturdy tripod, and a cable release to keep your touch from shaking the camera.

This all made sense to me except that I would have thought that a long exposure would make the lightning nothing but a white blur. The other thing I did not understand was what exactly mirror lock-up is. He included a picture that I really like because it has great composure using the houses as perspective, is sharp because the exposure is down at 2 seconds, and lists the settings he used.


https://www.exposureguide.com/lightning-photography-tips/

Sunday, September 29, 2019

Film vs Digital

A common debate in photography is whether film or digital photography is better. When it comes to landscape and nature photography there are many photographers that swear by digital for most of their shots as well as many who prefer to use film. With that said, many professional photographers are able to use both effectively. There are tradeoffs with both

Below, I have linked a short article on the Dark Room website that does a photo comparison of digital. They compare landscape photos side by side, the left one being on a film camera and the right photo on a digital one. They claim that they used the same settings in both pictures and that both are unedited. The first difference I notice is the film picture has much more vibrant and rich colors and when I look closer I notice less grain. The article goes on to list the advantages of both digital and film. I will not list all the advantages they mention in the article but it clams that film as advantages such as better detail, higher resolution, being more forgiving with minor focusing issues, and that you have to think about the image more before taking it. The advantages it lists for digital include convenience/instant gratification because you can look at the photos instantly and they can be stored on a small memory card, variable shutter speed between individual shots, built-in filters, and instant and convenient editing.

This article raised a question that it didn't answer, which was why the film camera has advantages like producing a more vivid color picture when unedited with the same settings or why it gives better detail. 

Personally, I prefer digital. This is mostly because I am a beginner photographer who is just learning about the different exposure settings and what they do. Being able to snap a photo, look at it, change my exposure settings and take another instantly makes gaining an understanding of exposure and how to manipulate it to get what I want much quicker and easier. Another reason is that the most striking difference between the two compared photos (the vividness of colors) can be changed with filters while taking the shot and/or the easy and convenient editing programs almost instantly after the shot is taken. For now, I will stick with digital, but later on, once I gain an understanding of all the concepts I many try film photography.

https://thedarkroom.com/film-vs-digital-comparison/

Wednesday, September 25, 2019

Long Exposure Photography

One of the types of photography that has interested me is long exposure photography. When a photographer uses a long exposure on images such as a stream/river to give the water that white blur effect as it is rushing over rocks or urban photography where passing vehicles appear to just be light trails.

Linked below is an article written by photographer Barry J. Brady on the Digital Photography School website. In this article, he discusses how to go about doing this long exposure photography. He first mentions what you need to do the shots. This includes a camera that has the ability to shoot manual and/or a shutter priority setting, a tripod because the stability of the camera is essential when using long shutter speeds, and he also recommends a cable release so you are not shaking the camera by pressing the shutter release. When it comes to the subject and composure he recommends having a moving element such as water, clouds, or passing cars while everything else is stationary. He then goes into the settings he recommends. First, he says shutter speed should be a few seconds or longer depending on the speed of the moving subject. He recommends an aperture between f8 and f16 depending on how much light there is. he also recommends keeping the iso as low as possible given the lighting conditions. He says the best time for these shots is as the sun is setting or shortly after or early evening when shooting light trails.

Just like Barry states in the article, I think it brings a new perspective to things we see every day. I  find these shots beautiful because they capture something the naked human eye could never see. This style of photography is appealing to me and something I would like to do myself.

https://digital-photography-school.com/how-to-do-long-exposure-photography-and-light-trails-at-night/

Tuesday, September 24, 2019

Applying the Exposure Triangle

These four pictures are examples of what can be done with photography when you take into consideration the exposure triangle and use the camera's iso, shutter speed, and aperture settings


The first photo I was attempting to get a clear photo of a passing car (as clear as I could get with the lighting conditions). To do this I used a high iso (1250) to allow more light in but in turn making it grainy. I used a low aperture value (f/3.5) in order to allow more light in. Finally, I went with a middle ground on the shutter speed at 1/30 giving a somewhat clear image of the car. In the second photo, I attempted to mimic the artistic thing some photographers do when doing night photography that involves passing cars. To do so, I dropped the shutter speed to 1 second. This also made it possible to increase the aperture and decrease the iso for less grain and to have more of the image in focus.


For these two photos, I focused on the aperture. In the first one, I set it to a low aperture value which is why the leaves in the foreground are in focus while the trees in the background are blurry and out of focus. In the second photo, I raised the aperture value which brought everything in the photo into focus. 

My 3 takeaways

The first important thing I learned in this class is the exposure triangle and how to apply it when shooting. Setting my camera in manual mo...